Thursday, 30 November 2017

Current progress, in a few points

Since the start of this school period on November 13th, we continued working on creating our prototype. Because it is our penultimate school period, a large part of our timetable is filled with "Project" time.

To begin with, we had received our motors and planetary gearboxes, received gearwheels that we had bored to the right dimensions, we had begun programming the Arduino Mega,  finished our 3D design and were controlling the parts' blueprints.

As of now, we have machined a large majority of our metal parts and begun assembling the prototype's frame. Some parts had to be modified to take into account the characteristics of our school's workshop. For exemple one major part, the wheels, have to be sintered since they cannot be milled. Also, the original RICA III motors were joined to the frame through a sinter support.


For testing and validation purposes, we also worked with the other MKX team to produce a step to the right dimensions (30*28 cm).

Concerning the electronics and programming part of our project, we : 
 - realized the main program of our Arduino Mega, 
 - received the encoders and began integrating them,
 - created the encasing for the electronics.

At this point, we can control our motors with a Xbox 360 controller. Still, we are missing some components and cannot finish programming at the moment.

We also worked on a 3D simulation of our prototype's movements on the software Unity (More details in this post).

We are halfway through this period, and "Project" time will be less present in our timetables, but we plan to continue working and if possible have a fully assembled prototype for December 15th.
Simulation - Work in progress

We keep working on the simulation and as you can see below these lines, we updated the environnement of the simulation. We also improved the physics and we enhanced the camera vision.

Some details will be implemented but the next major step is to fit the simulation to the real behavior of our prototype.


(Use full-screen mode)


Tuesday, 28 November 2017

Into the simulation

As a bonus, we are developping a full-scall simulation of our robot. We firstly used this simulation to test our control program. Now we want to improve it and we aim to use it for piloting assistance.
 
The simulation uses datas sent by the robot from the closed loop controle. Our goal is to make the simulation as real as possible in term of kinematics, kinetics and dynamics to make it usable.

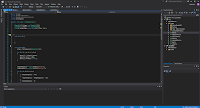
                                                                           Scripting C# on visual studio                                       Screenshot of the modelling

The simulation is developped with unity 3D wich combines graphical programming and scripting.
Here is a demonstration of our work wich is not over. We will have to match the simulation with the real behavior of the robot and add textures.

                                                                                               Working on the simulation


Manufacturing the RICA IV

As part of the realization of the RICA IV, we manufactured most of the parts on the school's mechatronics platform. We did the machining by ourselves, assisted by our teachers when it was needed. Many pieces were made on conventional lathes. The most complex parts were made on CNC machines (5-axis lathe and milling machine) that we programmed. For the flat parts (frame and arms), we used a CAM program that we did on CATIA V5.  

 
                                                    Conventional lathe                          numerically controlled milling machine                                band-saw

Electric housing


The electric housing is now manufactured. It is composed of 4 pieces mounted together around the motors support.
The two parts, where the electronics will be integrated, were printed with wire while the top plate was printed in two parts by sintering.


                                       Motors support (sintered)                 Electronics support (3D printed)                      Top plate (sintered)


So that the whole mounts correctly on the frame, we had to slightly sand. Now we will start the integration of the electronics !

Our cursus' Skill Repository

Note : As a reminder, you could check out the Mechatronics Wikipedia page linked here to get a deeper understanding of how our cursus is designed.

Our school uses a skill repository to check and improve the growth of us apprentices. It is mainly devided into three categories : Project management, Product management and Organization.

All our tools are in this box

If you look deeper in those categories, you will see more precise skills that represents all that a mechatronics engineer must learn and use in his career.
Those skills mix together, forming the base of Mechatronics Engeneering

If you are interested in the meaning of those skills, please check this link to see a full display of those skills' descriptions and a table of all our posts organized as such.